home tutorials features parties custom orders

Thursday, May 30, 2013

Patriotic Hopscotch Top

Now that Memorial Day is over, it's time to gear up for the 4th of July.  I've got the perfect top for your little girl to wear to celebrate our nation's independence--the Patriotic Hopscotch Top!


To make this adorable and festive top, I used the Hopscotch Top/Tunic/Dress Pattern from Peek-a-Boo Pattern Shop and the Happy 4th of July embroidery design from Embroitque.

Disclosure:  I am an affiliate of Peek-a-Boo Pattern Shop and was provided both the pattern and embroidery design for free, but all opinions in this post are 100% my own.

I've been wanting to try out the Hopscotch Top Pattern for a while now.  It has such a classic, simple style with a fit that is ideal for active little girls.  Now, the pattern designer provides instructions on how to add a center decorative placket down the front bodice, but when I saw this design, I thought the front bodice was just the perfect pallet for an applique or embroidery design.


So, in order to make the Patriotic Hopscotch Top, I embroidered this Happy 4th of July design to the bodice.  To make it easy to center, I first traced the pattern bodice piece onto my white fabric and marked the center.  Next, I hooped my fabric and then stitched out this design.


I'm finding that I really enjoy basic embroidery designs so much better than applique designs, and Embroitque has lots of really cute designs.  All the stopping and starting and removing the hoop from the machine to trim fabrics is a little stressful and time consuming in my opinion.  With this embroidery design, I just had to switch out the thread colors and trim a few threads.  The entire design took maybe 20 to 25 minutes to stitch out!

Next, I decided the bodice needed a little pop of color, so I trimmed the waist, the neckline, and the back button placket with red piping.  This added a little time to the construction of the top, but it was well worth it.


For the rest of the top, I stuck with the original pattern design.  The bodice is fully lined and those little flutter sleeves just add the perfect touch of femininity and sweetness to the piece.


The Hopscotch Pattern offers pattern lengths for three styles--Top, Tunic, and Dress--and comes in sizes 3 mo. to 8 years, so I know I will be getting lots and lots of use out of this design!

Plus, as I mentioned earlier, you can do so many things with this pattern to make it all your own. Add the center placket (as provided in the pattern) but maybe add some ric rac or other trim down the center of it to jazz it up even more.  Sew a ruffle strip down the center of the bodice or maybe leave off the the flutter sleeves.  And finally, I can just see this as an adorable dress with a monogrammed bodice!  Can't you?

I made Ella a size 5T based on her actual measurements compared to the pattern sizing chart.  The fit of the top is perfect and comfortable on her.  She squealed when I showed it to her the first time and insisted on wearing it right away.  Always a very good sign when that happens!


So by now you know I am a big fan of Peek-a-Boo Pattern Shop patterns, and it's not just because I am an affiliate.  I am an affiliate because I like her patterns so much, and I've made quite a few with plans to make lots more.

If you are also a fan of Peek-a-Boo Pattern Shop or would like to try out one of her designs, then today you can pick up the Lazy Days Romper Pattern for just $4 for Thrifty Thursday!


Happy sewing!  Have a great day!

Tuesday, May 28, 2013

Retro Romper Pattern

Last week I tested the Retro Romper Pattern by Blank Slate Patterns .  It has officially been released for sale here as of today!

Disclosure:  I am an affiliate of Blank Slate Patterns, but all opinions regarding this pattern are 100% my own.


I love rompers, and apparently, so do a lot of other people!  It's just a shame that adults don't look quite as adorable in them as children do.  Well, I can still get my fix of rompers by making lots for Ella to wear this summer.  This has already become a favorite of hers.

The Retro Romper Pattern is appropriately named.  This design so reminds me of the '80's, and I could swear I had a terry cloth version of this exact design when I was a child.  I've even looked through a few old photo albums searching for a photo of me wearing it.  Hopefully I'm not thinking of someone else, but I have not come across the photo--yet!  When I do, I'll be sure to post an update.

This pattern is such a simple design and the perfect piece of clothing for summer!  It's cool and comfy for running around outside in the hot sun and ideal for playing/bending/squatting both indoors and out.  The Retro Romper Pattern offers both a shorts and skort version, and I think the latter would make a great swimsuit cover-up for little girls!

There are absolutely no seams to hem on this romper since everything is trimmed with bias binding!


I made all my binding out of quilting cotton in order to coordinate with the floral main fabric of the romper. It took a little extra time to fold and iron it all out without the use of a bias tape maker or using pre-made bias tape, but it's always well worth it.  I use bias binding often to hem skirts, dresses, or even tops because it is an easy way to add color or a visual interest to the garment.

For my shorts version of the Retro Romper, I used quilting cotton; however, the pattern is suitable for wovens or knits and includes sizes 18 months to 8.  I made Ella a size 5T and think it fits her perfectly.


The waist is gathered using elastic, and the pattern shows you an easy way to create the casing when you sew the shorts to the bodice.  Although not included in the pattern, you could easily shirr the waist with a couple of rows of elastic thread to create the same fit in lieu of an elastic casing.


I considered adding some pockets to the bum, but after making one and pinning it on to the shorts part, decided to just keep it plain and simple.  One great thing about the Blank Slate Patterns is that the designs are such that you can add all kinds of personal touches to an outfit with the use of trims, buttons, a ruffle placket down the front, pockets in the front or back, a sash around the waist, a ruffle across the front, and I could go on and on.  The bodice could even be appliqued or embroidered to personalize the look. The options are endless!


This pattern was a joy to test!  It was simple, it was a quick sew (roughly 2 hours), it fits perfectly, and it's adorable on!  I can't tell you how many compliments Ella received when she wore this out to my son's ballgame.  Even a few moms said they wish they had one in their size, so obviously, I'm not the only one with a romper crush!

Blank Slate Patterns also released two additional patterns today as part of their Summer Vibe collection--the Big Island Board Shorts and the Baja Hoodie.


And if you love rompers like I do, then be sure to check out some of the others I've made--


I'll also be participating in Romper Week at Sewing Mama RaeAnna starting June 19th!  Be sure to follow along the entire week for some amazing romper inspiration.  You can also check out our romper inspired pinterest board.

Romper Week

Have a great day!

Follow on Bloglovin

Sunday, May 26, 2013

Last Minute Teacher Gift

My son finished up third grade last week, and in normal fashion, I waited to the last minute to make his teacher a gift!  I had decided earlier in the week that I would make her an embroidered zipper pouch, but with all the extra activities at school and Ella's dance class during the week, I just didn't make the time to get it done before the last day of school!

So, on the morning of my son's last half day, I cut out a piece of duck cloth and set up my embroidery machine to stitch out this cute bird in a nest of leaves design.  The design is from Hang to Dry.  I purchased it a few weeks ago when they had a sale.  I'm finding that I enjoy embroidery designs much better than applique designs.  I get a little frustrated with all the stopping and starting and removing the hoop from my machine for applique work.


Anyway, I had not tested out this design before, so it was a make it work no matter what kind of moment!  The design stitched out pretty good, but because it jumps from leaf to leaf so quickly, I didn't stop each time to trim the threads and instead waited until it was finished to do all the trimming.  Well, as you can see, that made it difficult in some spots to get a close snip, and some of the threads frayed or fuzzed up on the ends as a result.  Also, some of the outline stitching was off from the fill.  All in all I really like the design and will use it again.


I then used a piece of Amy Butler's Lark Floral Couture in Berry for the lining paired with a pink zipper and a matching zipper pull.  Project complete!


Ella and I were able to leave the house with enough time to run by the store and purchase a gift card to The Cheesecake Factory to go inside the pouch.  When we got to the school, Connor was already outside waiting, so we ran back in to find his teacher.  He gave her the gift and she loved it!  Whew!  Next year, I hope I don't wait to the very last minute to make the teacher gift, but I'm glad I finished this one in the nick of time.  Mrs. Fields was a wonderful teacher and my son loved her class!

Now it's on to the fourth grade--already!  Hope you have a great summer!

Thursday, May 23, 2013

Adelaide Vintage Romper - Knit Version + 3 Pack Pattern Giveaway!

A few weeks ago, Peek-a-Boo Pattern Shop introduced a new romper pattern--the Adelaide Vintage Romper.  Disclosure:  I am an affiliate for Peek-a-Boo Pattern Shop, but all opinions provided in this post are 100% my own.  I'm sure you've seen pictures of the pattern cover with the cute girl wearing the teal chevron romper with red trim.  Well, I could have sworn it was knit fabric, so I emailed Amy, the pattern designer, to confirm my suspicion.  She said is was just quilting cotton, but then asked if I wanted to try out the pattern in knit fabric.  I said sure!


The Adelaide Vintage Romper pattern is not designed specifically for knit fabrics, but it is definitely doable to make it out of knit.  I did it with just a few slight modifications to the original pattern instructions.  If you are interested in attempting this adorable romper in knit, then I suggest you read through my post first for some helpful advice.

For my knit version of the Adelaide Vintage Romper, I used 100% cotton interlock knit.  For the piping and the leg cuffs, I used a cotton wide ribbed knit that had a touch of spandex in it.

First, cut out your bodice, shorts, collar, and tie pieces using the main fabric and making sure the direction of stretch is across each of the pieces.  Next, cut out the cuffs and enough 1" strips to make your piping (if you choose to add piping to your look).  I use 1/8" nylon cording found at the hardware store or in the hardware section at Wal-mart to make piping.  You can buy a 40' roll for less than $3.


Follow the Adelaide Vintage Romper pattern instructions like normal for attaching the piping, sewing the collar to the bodice, shirring the back and adding the elastic, and making the pockets.  Here's where I veered away from the order of the pattern instructions and took a slightly different approach mainly because of the knit fabric.

Next, I sewed the bodice lining to the bodice front (RST) across the top using my serger and making sure to sandwich the tie straps in between the two.  Flip the pieces so right sides are out and press the seam flat.  Now I pinned with RST the bodice back and the bodice front along the side seams and serged the edges.  I used my regular sewing machine to tack down the seam toward the back bodice.


By now, you have already sewn the shorts pockets on, so take the two front shorts pieces RST and sew down the crotch seam with your serger.  Leave the inseam open.  Do the same thing for the two back shorts pieces.  With RST, sew the front shorts to the back shorts along the side seams (inseam is still unsewn).  Take one of the ribbed knit cuff pieces and fold it in half along the length with WST.  This piece will be shorter than the leg opening, so stretch it as necessary when pinning it to the bottom of the shorts.  Make sure that raw edges are matching and that the cuff is on top of the right side of the shorts leg.  Hope this makes sense!  Once you have it pinned in place, serge the cuff to the shorts and then flip the cuff down so the seam will be on the inside of the garment.  Repeat for the other leg.  Now pin the inseam RST and making sure to match the seams of the crotch and the cuffs before serging the seam.


Again, you can tack the serged seam at the leg opening down with a regular stitch on your sewing machine.

You should now have a separate top and bottom for the romper.  All we have left to do is attach them together at the waist.  I turned the bodice wrong side out and slipped it over the right side of the shorts and matched up the raw edges and side seams.  Pin the pieces together and then sew together using your regular sewing machine's zipper foot and a stretch needle (since there is piping along the front bodice at the waist).  Then use your serger to finish the edges of the seam.


That's it!  Easy as can be, right?  The knit version is so soft and comfy to wear, and perfect for play time or a walk outside.

Now I want to make an Adelaide Vintage Romper in quilting cotton just so I can say I've played by the rules!  The knit version was fun to make though, and if you have experience sewing with knits, I recommend giving it a try!  I'm pretty sure you'll be glad you did!

Oh, guess what?  Today is Thrifty Thursday at Peek-a-Boo Pattern Shop, and that means one special pattern is on sale for today only for $4!  This week's Thrifty Thursday pattern is the Susie Sun Dress! Don't miss this deal!


Now for the giveaway!

Want a chance to win a 3 pack of pdf patterns from Peek-a-Boo Pattern Shop?  Of course you do!  Who wouldn't?!  Enter using the Rafflecopter widget below to earn up to three entries.  Winner will be announced here on Monday, May 27, 2013!

a Rafflecopter giveaway

Thanks for stopping by today, and a big thank you to Amy from Peek-a-Boo Pattern Shop for offering the patterns in the giveaway!

Follow on Bloglovin

Monday, May 20, 2013

It's Skirt Week Time

Skirt Week at Crafterhours has begun!  I know you are as excited as I am!  I've got some great skirt patterns that I am eager to try out, and I can't wait to see all the guest posts with fantastic ideas and tutorials for creating some stylish new designs.  I hope you'll follow along, too! 

crafterhours

I'll be making an exciting announcement that has to do with Skirt Week in a few days, so make sure you follow along in GFC or in Bloglovin so you don't miss it!

To read more about Skirt Week, the rules, and where to upload photos of your skirt entries, hop over to Crafterhours for the details.  So if you are looking for some great skirt tutorials and inspiration, Skirt Week is the place you'll want to be!  See you there!

Saturday, May 18, 2013

Scirocco Dress

Hey!  Did you buy the Sew Fab Pattern Bundle that was for sale a few months ago?  Have you tried out all the patterns in the bundle yet?  I'm slowly making my way through them, and I am determined to give pretty much every single one a try eventually.

So far, I've made the Ruby Lou Doll, the Commuter Cowl, the Alex & Anna Summer PJ's, the Modern Folksy Bunny, and now, Figgy's Scirocco Dress!  Five down and thirteen more to go!  Whew!

I actually made the Scirocco Dress right after I bought the pattern bundle, but for some reason or another, I just haven't taken the time to blog about it.  It's an amazing little dress with such a grown up feel to it.  Ella wore it for two days straight at the end of February when we were having freezing weather!  She didn't care.  She thought it was fun and different and great to spin around in!  Here's the first picture I took of her in it.  Look at that attitude!


The first time I saw this pattern, I knew I wanted it, but at the time, I think it was only available in paper form.  I was lazy and didn't want to spend that much money plus shipping on a single pattern, so I waited and waited until I saw it in pdf form for sale in the Sew Fab Pattern Bundle. I'm pretty sure all of Figgy's patterns are now for sale as pdf's, too, and at a fraction of the cost in case you missed the Sew Fab sale.


Anyway, I couldn't wait to make this dress.  I love the unique style of Figgy's patterns and not just for the garment designs, but also for the modern, clean layout and beautifully illustrated and written pattern instructions.  When you make a Figgy's pattern, you will learn something new everytime, and I mean the professional way to sew it.

I wanted to make this dress stand out, so I chose to hem the flounces with a narrow bias trim and sew red piping down the center pleats.  One friend commented that Ella reminds her of a Flamenco dancer wearing this.  Well, she sort of does!


The trickiest part of making this dress was the back bodice.  I had to read through the instructions multiple times and in fact cut out two extra pieces by accident because I thought I had done it wrong the first time!  Once I figured it all out, it was one of those ah-ha moments!


I followed the sizing chart provided in the Scirocco Pattern and based on Ella's measurements chose to make a size 4/5.  Now the only complaint I have is about the fit of the upper bodice.  I've seen several other posts where people have made this dress, and most appear to have the same issue.  The bodice puckers at the sides on the back at the waist, and the reason for this is that the bodice is too long.  If I pinch the should seams up an inch or two, the puckering is gone.  That's a note I'm adding to my pattern instructions as a reminder to shorten the shoulder seam next time I make it!


Have you tried out the Scirocco Dress Pattern by Figgy's?  If so, leave me a comment and tell me what you think of the pattern and/or a link to your blog post about it.  Now, I think it's time to go do some dancing!  Ole!


Thanks for stopping by and please follow along by signing up through Bloglovin below or any of the social media icons in the upper right hand corner of the blog page.

Follow on Bloglovin

Thursday, May 16, 2013

Roly Poly Pinafore + Pattern Giveaway

This pattern name is so fun to say--Roly Poly Pinafore--and it was a lot of fun to make, too!  The Roly Poly Pinafore is the first of what I know will be many great patterns by the multi-talented Rachael of Imagine Gnats.  In fact, if you saw my post from Tuesday, you know she already has a second pattern (the Tumble Tee) in testing that will be released soon.

Today though, I'm sharing with you my version of the Roly Poly Pinafore as part of the Roly Poly-along blog tour that is happening through the end of May.


When I first signed up to make a Roly Poly Pinafore for the blog tour, I had considered sewing together strips of a jelly roll and using the yardage created as the fabric for the top.  However, after sewing together all 40 strips of fabric (ugh!), I decided that it just wasn't the look I wanted to give this fun, playful top.  So, I riffled through my fabric stash and came across this colorful novelty print I bought last year called Woodland Friends by Ellen Crimi-Trent for Clothworks.  The reverse side is a quilting cotton I bought at the same time but have no idea of the name.


The Roly Poly Pinafore is so sweet and simple, yet the single pleat in the front and the cross over panels in the back set it apart from a basic a-line top or dress and add a touch of whimsy to the look.  This top is also apparently the perfect thing to wear for a day out at the playground!


The pinafore is completely reversible with no exposed seams, and both sides have their own set of in-seam pockets although I couldn't get my model to use them for any pictures!


Rachael has done an excellent job with this pattern.  I made Ella a size 5, and as you can see, it fits perfectly.  The pattern includes sizes 6 months to size 10, but the pattern pieces are separated out into two groups so you won't waste ink and paper printing out multiple sizes you don't need.  The pattern instructions also show you how to cut out the fabric with the pocket piece attached to the bodice pieces already or as separate pieces that you sew on.

Reversible tops and dresses are so easy to make and eliminate the need for pressing under hems and using the serger to finish raw edges.  Plus, if your child spills something on one side, you simply flip it over and they look all clean again!  Magic!

The overlap design in the back is ideal for climbing and swinging from monkey bars because it doesn't constrict your child's movement.  Plus, when the weather really heats up this summer, Ella can wear the Roly Poly Pinafore without the extra polo shirt underneath yet still be covered up.


Thanks, Rachael, for having me roll along in the Roly Poly-along Blog Tour!  It's been fun!

Can't get enough of the Roly Poly Pinafore?  Then you are in luck!  There are more Roly Poly sightings scheduled for every weekday for the rest of May.


5.13 Jill Made with Moxie / Stephanie The Crafty Kitty
5.14 Stephanie NeurosesGalore / Cherie you & mie
5.15 Ari Max California / Caila Caila Made
5.16 Veronica SewVery / Tara Girl like the sea
5.17 Nancy owen's olivia / Adrianna Crafterhours

5.20 Ajaire Call ajaire / Sarah EmmylouBeeDoo
5.21 Laura Craftstorming / Jessica a little gray
5.22 Frances Miss Matatabi / Nicke kiss kiss quilt
5.23 Amy formwork design / Kat Sew Chibi
5.24 Joanne Rose & Dahlia / Amanda Kitschy Coo

5.27 Celina Petit a Petit and family / Delia Delia Creates
5.28 Christy a.Amelia handmade / Carolyn Fake It While You Make It
5.29 Bonnie Fishsticks Designs / Maria La Inglesita
5.30 Jane Buzzmills / Kate Things for Charlie
5.31 Polly Jack & GeeGee / Molly Rose & Odin


Plus, you can enter my contest below for a chance to win your own copy of the Roly Poly Pinafore pattern, compliments of Rachael at Imagine Gnats!  Winner will be announced on Monday, May 20th!

a Rafflecopter giveaway

Follow on Bloglovin

Wednesday, May 15, 2013

Kelly's Kids Mary Dress: Knock-It-Off Series

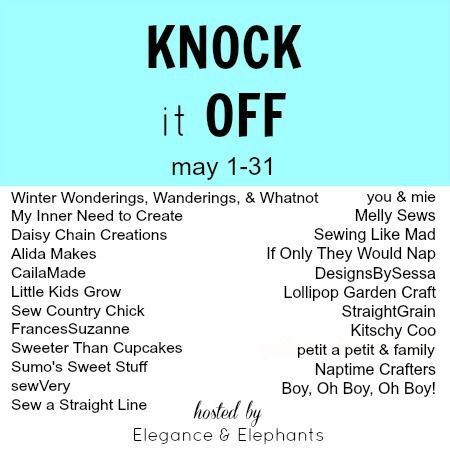
I love the Knock-It-Off Series hosted by Elegance & Elephants!  I think it might possibly be my favorite sewing series so far, so you can imagine how excited I was to be invited by the extremely talented Heidi to participate in it this year.  Thank you, Heidi!

Elegance & Elephants

Every season, I like to browse the online catalog of Kelly's Kids for ideas.  I love their items but not their prices!  Based on their summer catalog, I had no lack of inspiration for this challenge, so I turned to my readers to help me decide what Kelly's Kids look to knock off!  I set up a Pinterest Board with four dresses and a romper and asked everyone to vote for their favorite look.  After about a week and a half, the likes, comments, and repins were counted, and the Mary Dress from Kelly's Kids was the winner!  I was very pleased that you all picked this because it was one of my favorites!


This is not the first time I've knocked off a Kelly's Kids dress.  I made a size 8 pattern for the Caroline Dress last year (free pattern to download here) based on a request from a friend.  It turned out great, and it was a lot of fun figuring out the pattern pieces from solely looking at a picture online!

In the case of the Mary Dress, I first looked through all my patterns to make sure I didn't have something already similar.  Nope, no such luck!  So, the next step was to make my own pattern.

Sorry I didn't take any pictures of this process.  When I get going on a pattern design like this, I have to keep my thought process in motion instead of stopping and starting to take pictures in good light.  I'll do my best to describe it below.

I started off with a basic a-line dress pattern, traced the front and back pieces onto freezer paper in a size 5T.  The back piece had no changes to make, so I set it aside.  As for the front piece, I squared up the neck opening and then drew a line from the square of the neck to approximately 7" from the bottom on the side seam (estimated this by looking at the photo on the Kelly's Kids site).  I then added seam allowance and cut off that piece.


Now for the tricky part.  The center front piece is gathered at the top and is cut at an angle on part of the side.  You can see these finished details below.


For this, I had to use some of my engineering drafting skills and calculate proper angles and lengths.  After just a couple of drafts of this piece, I felt pretty confident that it would all go together properly.  I then took the two front pieces, taped them back together, and then traced around the upper part to create the front lining pattern piece.  I traced the upper part of the back dress piece to make the back lining pattern piece, too.  For the inseam pocket, I just borrowed a pocket piece from another dress pattern.


I'm not one to make a muslin, so I just cut into the gray polka dot fabric (purchased at Hobby Lobby) and knew that I could make it work!  Yes, I watch Project Runway and was channeling Tim Gunn's optimistic spirit!

Well, you know what?  It did all go together just fine.  I saw a couple of little things that I need to tweak to make it better for the next time I make it, but it was pretty much a simple dress to create. Maybe I should make it into a fully graded pattern?  What do you think?


To finish the look, I made up a quick fabric flower pin.  I took two pieces of fabric (probably 6" x 8") and fused them to both sides of a piece of Heat-n-Bond Lite.  I then found three or four different round objects to trace onto the fabric and then cut out the circles.  I stacked the circles, tacked them together in the center, and then created the petals by clipping the edges toward the center of the circle.  When I was done, I sprayed a little water on it and crumbled it in my hand to loosen up the fabric and then sewed a small button in the center and let it try.  Hot glue a brooch pin to the back and you're done!


And here's a neat shot of my sewVery tag!  I've been playing around with the aperture setting of my point and shoot camera, and I thought this one turned out pretty good.


So there you have it!  My knock-off of the Mary Dress by Kelly's Kids!  I spent roughly $6 in materials to make my version versus $70 (dress and flower pin) + shipping to buy the original!  Does this mean I can go buy more fabric with all the money I saved?

Original Mary Dress from Kelly's Kids on left, and sewVery's Knock-Off on right
My little model has been sick all week, but you wouldn't really know it from these outtakes!  Two hours before, she was screaming and crying in pain from an ear infection.  Thank goodness the medicine kicked in so I could finally get some pictures of her wearing it.


Thanks again, Heidi, for asking me to participate in your Knock-It-Off Series!  I've enjoyed seeing all the other knock-offs blogged about and posted on in the Flickr group.


Elegance & Elephants

If this is your first time visiting my blog, I hope you'll decide to come back and visit again!  You can follow along by clicking the social media icons located at the top right hand side of the page or by clicking the Bloglovin link below!  It's been a treat having you here!  Have a great day!

Follow my blog with Bloglovin